I have tried to write up this recipe a number of times and it never fails that we either eat the pizza before I can get a photo, or there’s not enough daylight left outside to get good photos by the time I get home from work at twilight. To combat this lack of good photo light, I made a pizza at 2 in the afternoon just so I could photograph it. (We ate it later that night, but it wasn’t hot out of the oven at that point.) I’m still not 100% happy with the photos, and I would have like to have more dough rolling action shots, but I found it hard to get covered in olive oil, try to hold the camera, and take a decent dough rolling selfie. Food styling a lump of pizza dough is a hard task!

My obsession with pizza dough started just after our wedding. We were given a pizza stone by a few dear friends and it inspired me to learn how to make my own pizza dough. Before getting married, I’m not sure I had ever worked with yeast dough. I’d heard all the nightmare stories about how scary and sensitive yeast was and how you could kill it by looking at it wrong. It was almost as hyped up as the dreaded souffle (which is also not as scary as you’ve been told, but that’s a recipe for another day.) I started by looking up dough recipes online and picked a random one for my first try. I hadn’t yet learned the magical dough kneading properties of my stand mixer (another beloved wedding gift), so I patiently kneaded it by hand and left it on the counter to rise. When I returned an hour later, I had made pizza dough! It had risen on my first try and baked up into a kind of ugly but decent tasting pizza. I started reading more dough recipes and tried a new one every few days. (Hubby didn’t complain about all the fresh pizza he had to eat.) Eventually, I learned what I liked in a pizza and started tweaking and testing my own recipe. This is the final result, and has been a Friday night staple in our house for the last 3 years. (You can scroll all the way to the bottom of the page if you just want the recipe.)

If I could give you one tip for getting a perfect pizza dough every time, it would be to weigh your flour. I used to scoop into measuring cups and end up with dough that was too dry or too wet and I had to add extra water or flour each time. Once I got a scale and started measuring, my dough turned out the same each and every time. The second tip I might give is to use the dough hook on your stand mixer. My mixer is way more of a beast than I could ever be kneading the dough, and it gets nice and smooth every time. If you don’t have a mixer, you can still make the dough by hand, but you may want to get a bodybuilder friend to take turns kneading with you if you’re not used to it.
So, the first part of the dough recipe is to combine 250g of flour, the salt, sugar, and instant yeast with the paddle attachment in your mixing bowl. Give it a quick whirl to make sure it’s combined and then you’ll turn off the mixer, dump in the olive oil and warm water and turn the mixer back on stir and gradually increase the speed to make sure they’re combined. (A side note for the water: it should be warm, but not super hot – a nice temperature for washing your hands. If it would make your hands red, shoots up clouds of steam, or couldn’t be tolerated on the inside of your wrist, it’s too hot. The warm water will help the dough rise faster, so I tend to make it a bit warmer in the cold, winter months, and not as warm in the summer.)
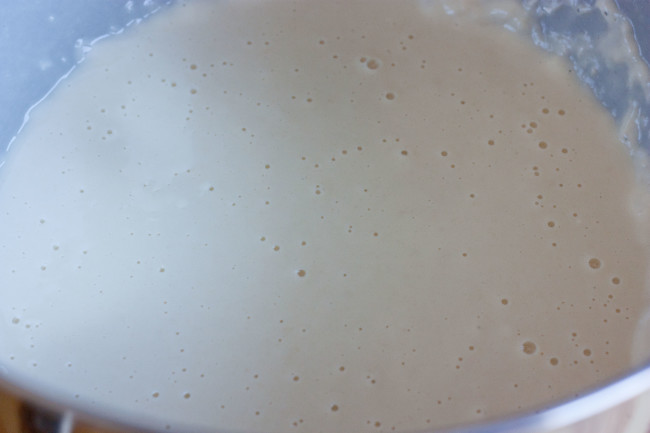
At this point you should start to see bubbles in the yeast mixture (see above photo). This is what tells you that it has “activated”. Turn off the mixer. I always use “instant” RapidRise bread machine yeast, so it’s good to go pretty quickly. If you use regular yeast, you may want to “proof” it by letting it sit for 5-10 minutes before moving to the next step. If you don’t see any bubbles after 10 minutes, your yeast is likely not happy and you should dump everything from the bowl and start over with new yeast or cooler water.
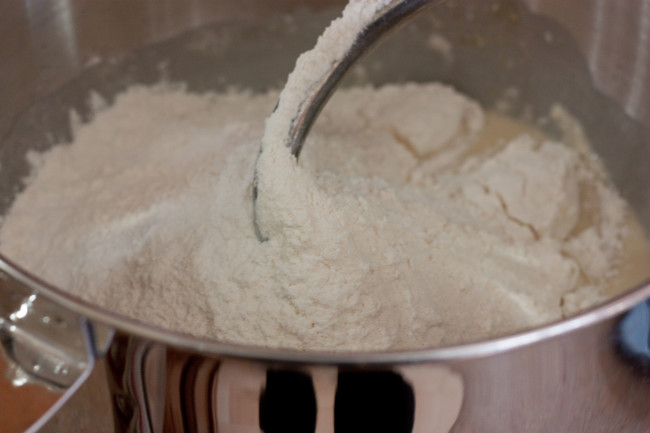
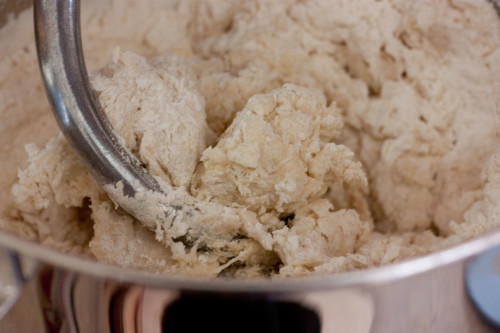
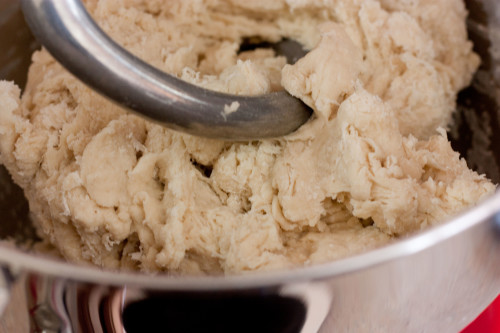
After you have bubbles, switch to the dough hook attachment, measure out your 600g of flour, and dump it all in at once. Yep, all of it. I’m breaking all the baking rules about slowly combining things. Since you have the dough hook on, it shouldn’t make the big puffy flour mess you’re afraid of. Turn the mixer on speed 2 (never go higher with the dough hook) and wait about 8 minutes for the dough to come together in a shaggy mess and be kneaded until it’s smooth. As long as you have the right quantities of flour and water, you shouldn’t have to scrape the bowl or touch it at all. (I’m really lazy, and I love that this dough is low maintenance.) See the set of photos below for the phases it will go through.
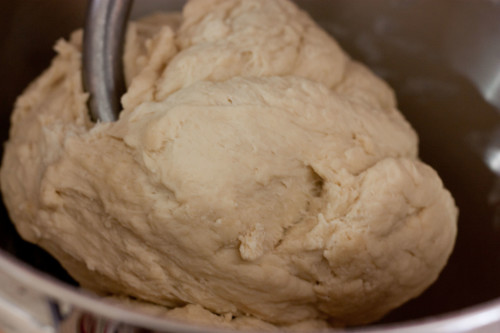
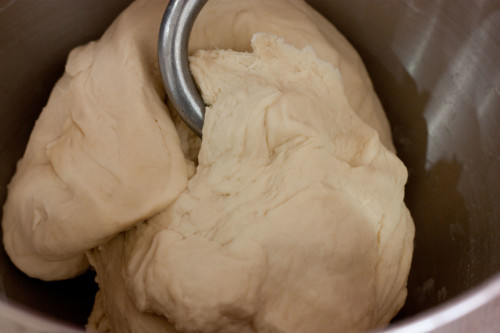
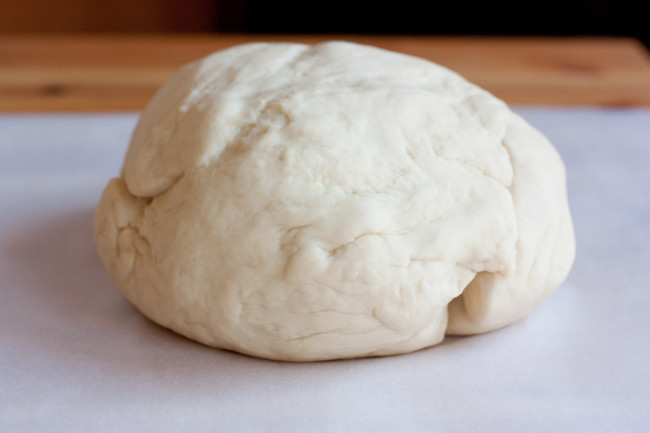
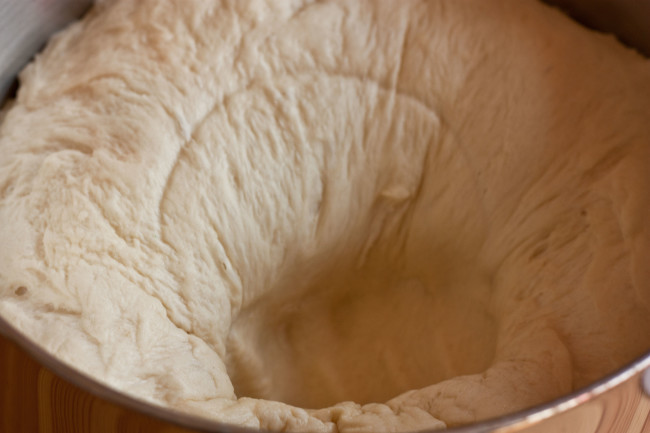
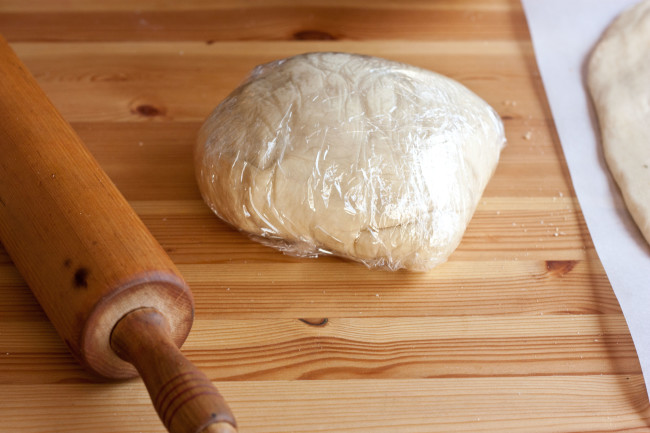
If you’ve weighed your flour, you should have a nice smooth, non-sticky, beautiful dough. (I’ve made this in many different climates and haven’t had any issues.) If you end up with stickiness, it’s okay to add a bit more flour at this point and continue mixing with the hook until it’s combined. Once you have your kneaded dough, remove the bowl from the mixer, set aside the dough hook, and form it into a nice, round ball. Drizzle a bit of olive oil over the top of the ball of dough and flip it over a few times to coat it. This will keep the dough from drying out while it waits to rise. Cover the bowl with plastic wrap, a lid, or a damp towel and set it somewhere warm to double in size. This will take anywhere from 45 minutes-1.5 hours depending on the temperature of your house.

After 45 minutes have passed (or it’s doubled in size), place your pizza stone in a cold oven and preheat it to 500 degrees. (No pizza stone? Flip a cookie sheet upside down on the oven rack to cook your pizza.) While the oven heats, punch down your pizza dough and split it equally into 2 large portions or 3 medium portions and decide how many you’re going to bake today. Anything you’re going to freeze for later should be wrapped tightly in a double layer of plastic wrap and then put in a Ziploc bag in the freezer. Dough can be frozen for 6-8 months and should be placed in the fridge to defrost the night before and brought to room temperature before shaping and baking. (Defrosting on the counter takes about 6 hours.)
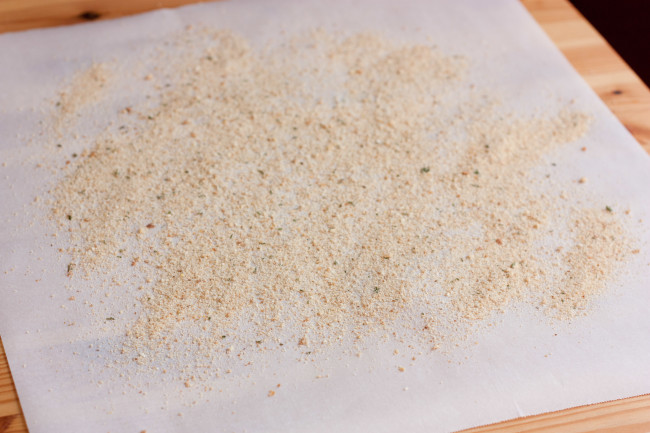
Grab a sheet of parchment paper and sprinkle the bread crumbs out into the shape of your pizza. Keep in mind the size and shape of your pan (rectangular) or stone (round/square) when laying out your dough.
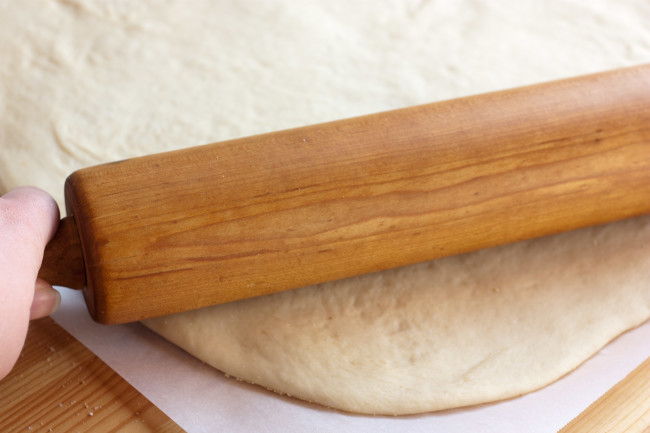
Pick up the dough with your hands and stretch it gently between them to spread it out, trying to keep it round. When it’s stretched a bit, place it on top of the breadcrumbs and use a rolling pin or your hands to spread it out further until it’s about 1/2″ thick. (We love thick, bread-like pizza, but you can spread it thinner if you want a crisper crust.) If you poke holes in the dough, don’t worry, you can just pinch them back together. If you run into trouble with the dough springing back instead of rolling out, let it rest for a few minutes and give the gluten time to relax before trying again.
Prick the dough randomly with a fork so it doesn’t puff up in the oven, brush the dough lightly with olive oil, and use a pizza peel or cookie sheet to transfer it to the waiting pre-heated pizza stone. Bake the dough (un-topped) for 6 minutes. Remove crust from the oven, add desired sauce, toppings, and cheese and put it back into the oven for 5 more minutes, or until the cheese melts. I do this two step bake method because we like a puffy, focaccia-like dough. If you want a thinner crust, you can roll it thin and top it before you do any baking of the dough.
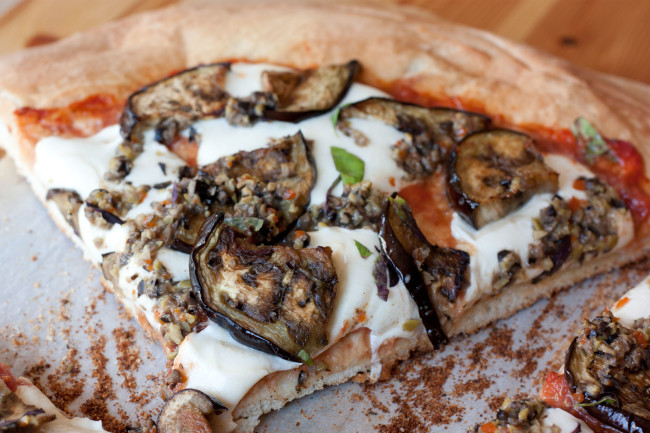
I’ll post this roasted eggplant and homemade olive tapenade pizza soon!

Easy Pizza Dough
- Prep Time: 15
- Cook Time: 16
- Total Time: 75
- Yield: 2 1x
Description
An easy, delicious pizza dough recipe.
Ingredients
For 2 large pizzas
- 850g (5-6 cups) all-purpose flour or bread flour (bread flour will result in a chewier crust)
- ¼ cup sugar
- 1 ½ Tablespoons fast rising yeast ( 2 envelopes)
- 1 teaspoon kosher salt
- 2 cups very warm water (120 degrees)
- ¼ cup olive oil
For rolling out crust
- ½ cup Italian or garlic breadcrumbs or cornmeal
- olive oil
Instructions
- In a mixer bowl with paddle attachment, combine 250g (about 2 cups) flour, sugar, undissolved yeast, and salt; blend well.
- Add warm water and oil to mixture. Blend at low speed until moistened, and then beat for 2 minutes at medium speed.
- Switch to dough hook. Add in 600g (3 to 4 cups) flour (If you’re not weighing, gradually add flour until dough pulls away from sides of bowl and is no longer sticky to the touch.)
- Knead dough in mixer (speed 2) for 8 minutes or until dough is smooth and a membrane forms easily when dough is stretched.
- Coat dough lightly with olive oil, cover bowl loosely with plastic and allow to rest in a warm place for 45-60 minutes or until doubled in size.
- Put your pizza stone or an upside down cookie sheet in the middle of the oven and preheat oven to 450̊ after about 45 minutes of rise time, so it’s ready with the dough.
- After dough has risen, punch down and divide equally into 2 large balls or 3 medium balls.
- Sprinkle parchment paper lightly with garlic or Italian flavor breadcrumbs or cornmeal.
- Press each ball of dough out into an 18-20″ circle.
- Brush crust lightly with olive oil. Prick dough randomly with a fork. Bake (un-topped) at 450 for 6 minutes.
- Remove from oven. Top pizza as desired and bake for another 5-10 minutes or until cheese is melted and crust is browned and sounds hollow when thumped.
Notes
- To freeze extra dough: wrap the ball in 2 layers of plastic wrap and place in a ziploc bag in the freezer. Defrost frozen dough overnight in the fridge or on the counter for 5-6 hours before pressing out and baking.
- Gluten-Free: While I’m sure you could make a pizza with this recipe and some gluten-free flour, I think you’d be better off searching for a recipe that is designed to be GF.
- Vegan: Top with sauce and veggies and you have a great vegan pizza!
Recipe Remix: This dough makes great breadsticks, stromboli, calzones, mini-pizzas, can be topped like focaccia, turned into garlic knots, cinnamon twists, or even pretzels.
What’s your favorite type of pizza?


I had to chuckle at your very first comment about taking a pizza dough rolling selfie. There have been many times I have missed the perfect shot for my blog because I was more concerned about getting a great dinner on the table. Sometimes I have my 7 or 10 year old daughter take an action picture for me, but they never turn out quite as well as I would like (there’s always something in the background or they’re not centered, or the part of the action I wanted them to focus on is not there, or the shot is taken too late, etc.). You probably know exactly what I mean.
I stopped by from Saturday Night Fever to check out your post because I love homemade pizza dough and always love to check out new recipes for it. I would like to invite you to share your talents on my new link party The Yuck Stops Here on Hot Momma’s Kitchen Chaos at http://mommasangelbaby.com. I hope to see you there! HUGS
It’s hard to be a blogger sometimes isn’t it? I don’t have kiddos yet, but my tripod gets about the same results as your kids. My husband is also a hobbyist photographer, but he always seems to be at work when I need him. (He comes home in time to eat it though.) I checked out your link party and linked up a few things. Thanks for the invite!
You’re so welcome! I’m so glad you came by and linked up with us and I hope to see your talents again soon! HUGS
Looks like a pizza night is in my future!
I do like to use my bread machine (I love gadgets), but I’m thinking the recipe may be too big (unless I halve) for the machine.
OR, I could stop being lazy and pull out the kitchenaid with the dough hook…. and have two pizzas…
I’m pretty sure your bread machine would burst at the seams with this one, so yeah, you should probably halve it or pull out your mixer. (Or do it by hand, but I doubt you knead to do that.)
This looks great! So you actually move the dough with the parchment paper onto the hot stone?
Yep! The parchment stays under the pizza through the whole cooking process. Just make sure it’s parchment paper (heat resistant) and not wax paper (melts when heated).