Want better lighting in your blog photos? Check out my $2 secret!
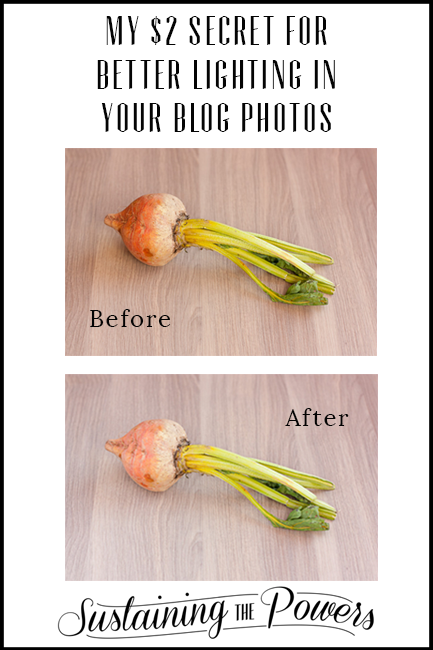
What’s the secret you ask? Well, if you saw inside my camera bag last week, you may remember that I listed a white piece of foam board as one of my essentials. That’s the big little secret! I wanted to share a few comparison photos with you in this post to show you what a difference using a reflector for “fill” light can make in your photos.
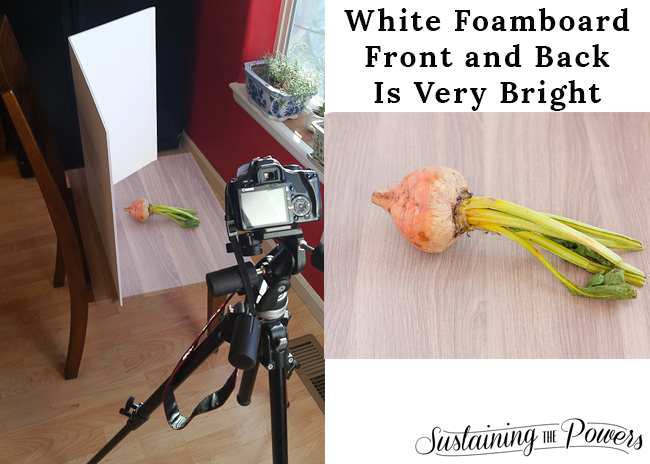
First, here’s a peek inside my fabulous photography studio:
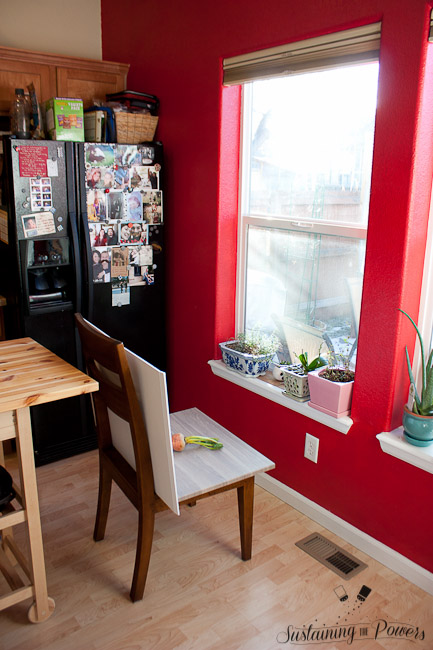
Are you impressed yet? That’s a chair from my dining room that I dragged across the room and placed in front of my fridge where the best natural window light is in our house. That black background you see in some of my photos? Yep, it’s the fridge! Who needs stainless steel appliances when you can have a fridge that doubles as a photo backdrop?
All fridge there in the back. Quite useful I’d say. Did you have any idea?
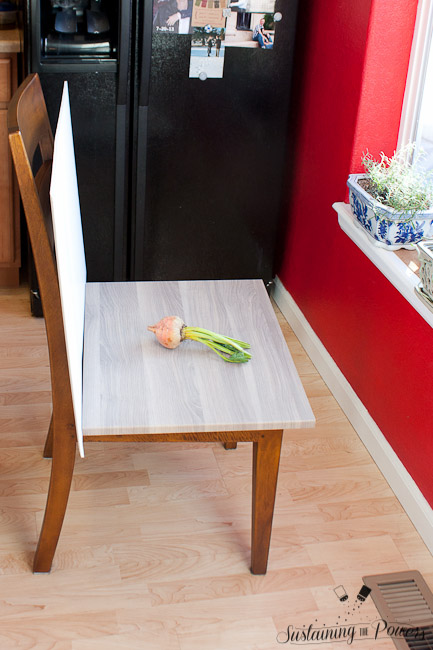
Here’s a closer photo of my “table top” backdrop (it’s a cabinet door from the IKEA as-is clearance department). I like to place it on the seat of a chair because that puts it lower than the window ledge and gives the foam board a spot to rest against the back of the chair. I can’t tell you how many times I tried to balance my foam board by propping it on something next to my food and ended up having it tip over and ruin my dish or get incredibly dirty. It once even knocked an entire glass jar of mandarin oranges off the table and into a smashed pile of glass, oranges, and juice when I was shooting my Orange Coconut Sticky Rice. So I’ve learned a few things since then. One is using this chair.
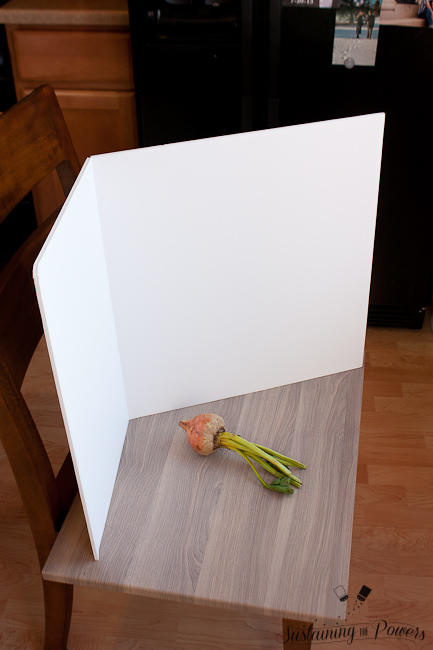
The other thing I’ve learned is to score it down the center by cutting through the paper on only one side so it can stand itself up on a table top or add some extra close reflected light. (This one isn’t scored down the center, but rather off center because I made a bad cut while trying to build a light box. I’m too cheap to spend another $2.)
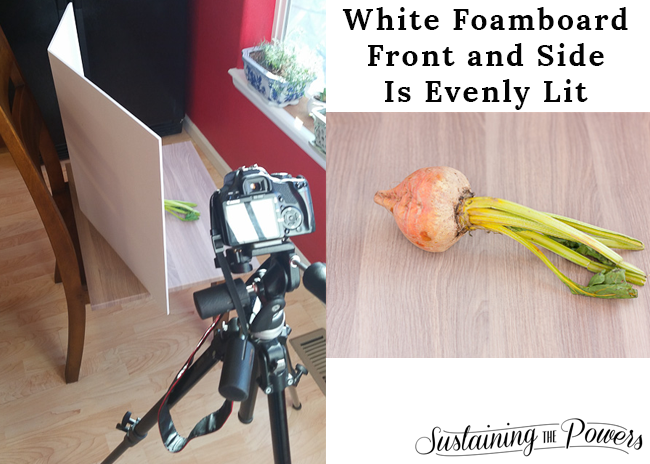
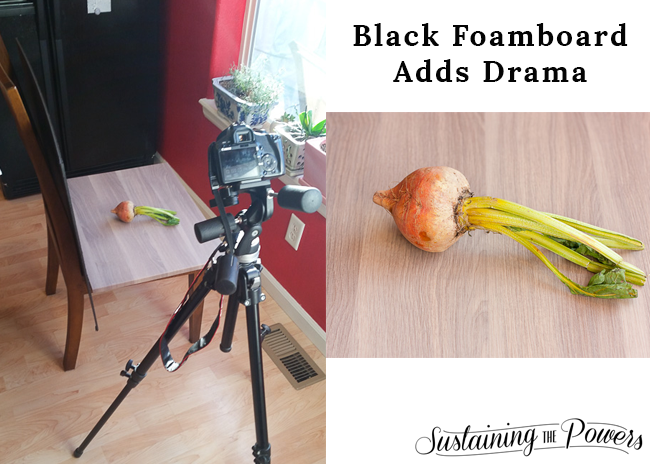
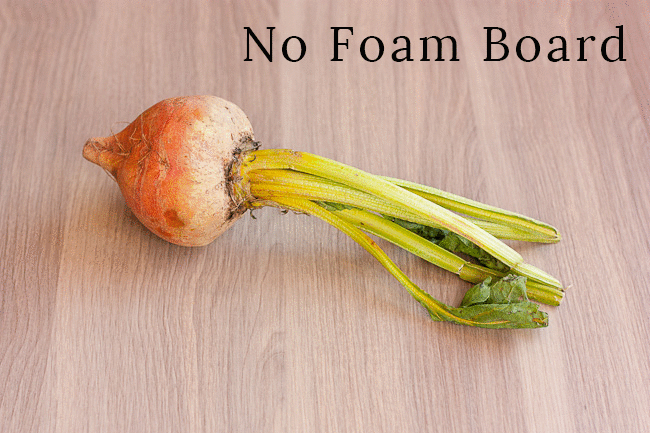
I’m going to keep this short and sweet, so I’ll just leave you with some side by side images of my photo setup and the shots I got while changing the location and color of my foam board “reflector.” All the camera settings are identical, and the shots are unedited and straight out of the camera (except for putting them side by side and adding the text of course). The only difference is the location of the foam board as noted.
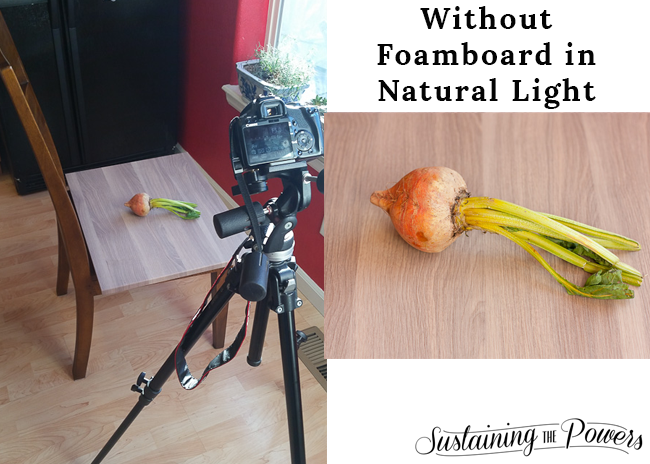
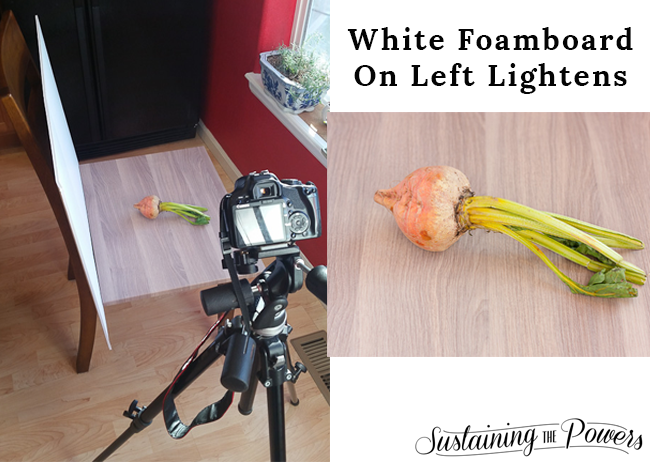
Also, here’s a GIF so you can see how they easily compare to each other. Pay attention to how the foam board reflector bounces the light from the window back into the shot and fills in some of the darker areas in the front of the image. Also, I wasn’t able to add music to this GIF, so please pretend that Michael Jackson’s song Just Beet Beat It is appropriately playing in the background.
Isn’t it cool how a little piece of foam board can make such a difference? You’ll have to play around with the placement a bit to get it just right for the lighting in your space, but I hope this helps you out as much as it has helped me! I know I need all the help I can get in the winter months when light is scarce! (And stay tuned for next week’s post about building your own tabletop softbox for under $30! You can subscribe to my photography email list so you don’t miss a thing!)
have you ever tried using a reflector for your photos?
P.S. I’m letting all the secrets out this week. On Wednesday I shared the secret to perfect crusted creme brulee sugar in your broiler.

")
 Tabletop Softbox for Under $30!")

This is such a great idea! I may have to try this. Love how you can see such a big difference!
You should definitely try it! Tag me on Instagram if you do- I’d love to see it. 🙂
I had no idea such an inexpensive item would make photos that much greater! Thanks so much for sharing this valuable tip :] xo
Thanks Stacey! Isn’t it crazy?! You can of course buy more expensive photography reflectors that have precise color values, but who needs to do that when you can grab this at the grocery store?
I recently started using white paper underneath my products and then against the back (like you do), but now I’m intrigued to try the foam boards. I wonder if it’d make the light reflecting softer on the products… either way, you’ve inspired me to take more thought on my blog pictures and try to get the best I can. 🙂 Thanks for your informative post!!
I feel like the rigid surface of the foam board gives the light a better bounce than white paper or posterboard. And I think it is a bit softer. When I want even more light I’ll set a piece of foil against the front of the posterboard as well, but then it leaves the photo a bit silver in color and I have to adjust the warmth when I edit it. The white foam board doesn’t really need the editing when I’m done with the photos, so it’s great if you don’t like editing or have fancy software.
Now I have “beat it” stuck in my head! That is the perfect song for this post! On a serious note this trick is great I will have to try that next time I have to photograph something small… I don’t think my bathtub will fit in front of your fridge for pictures!! I need to break down and buy lighting I suppose, some of my rooms are just too dark!
Haha. You probably can’t fit a tub in front of a fridge, but you can still use a piece of foam board to bounce the light to where you want it. You may need an extra person to hold it while you photograph, but I’ve used it to bounce light into dark corners or back onto people’s faces before. Or they sell 5 foot sheets of foam board at Office Max… Maybe a portable sheet of drywall? 😉
This is great! I actually bought the same thing last year, only I painted one black and left one white. It’s really helped!
That’s a great idea! The black one is also a backdrop, so I already had it on hand.
I have a foam board like that, too. I love that you use your black fridge as a backdrop!
Most of my pics are taken outside on my front porch with plenty of natural light. I know my neighbors thought I was crazy when I had a full-on New Year’s Eve tablescape and food on a table on my front porch. I hate to take pics inside (I’m not a for-real photographer), but these tips will really help me since it’s getting too cold down here in the south to continue to take pics outside. Thanks for linking up at the Pretty Pintastic Party.
Hahahaha. That is so awesome!! I’m slightly paranoid that my neighbors can see me taking photos through the windows and likely think I’m crazy too. I often stand on a ladder to get good arial shots. I’d love to take more photos outside, but Colorado seems to offer the challenge of either sunlight that is too intense with very high contrast (due to the high altitude) or freezing temps outside. It was just 8 degrees when I took these images, so outdoors is not happening for at least half the year. Thanks for hosting the party!
I have been meaning to get a foam board. It makes such a difference! Thanks for the reminder. I need to pick one up ASAP!
You totally should!! I love watching the gif so you can see how much it changes the images. Total game changer for sure!
I nearly spit my coffee out when you suggested the song, “Beat it!” Now it’ll be stuck in my head all day. But that’s okay, it’s a good one. Definitely adding foam board to my shopping list! Thanks for an enjoyable and informative post.
Hahaha! Mission accomplished! I may or may not have played that song in the background while doing this shoot. How often do you get a song that’s so perfect for a vegetable? I hope this trick helps you, and you may also like my post about how to build a softbox light out of foam board if you haven’t seen it already. 🙂
This is an awesome tip!! Thanks so much for sharing your secret!!! Can’t wait to try it out. -Sue
It’s the best secret ever! I can’t believe I almost bought an expensive reflector.
What a great post! I needed some ideas for my pics! Thanks for sharing!
Thank you so much for these tips! Now with less natural light as the days are short and dreary, I think this will help me!
I love how simple and inexpensive this tip is! Thank you for sharing it!