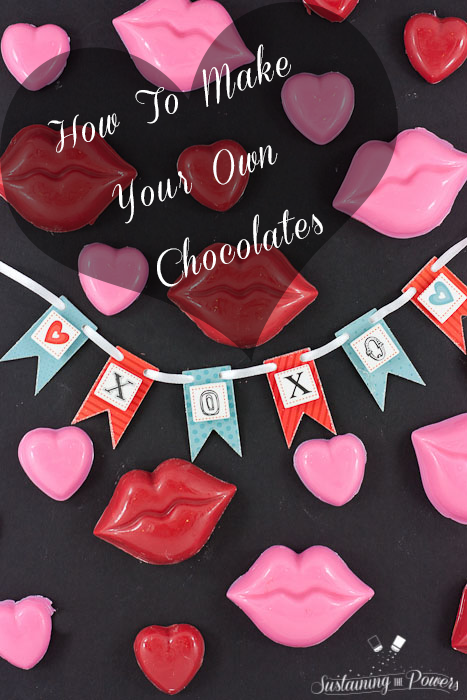
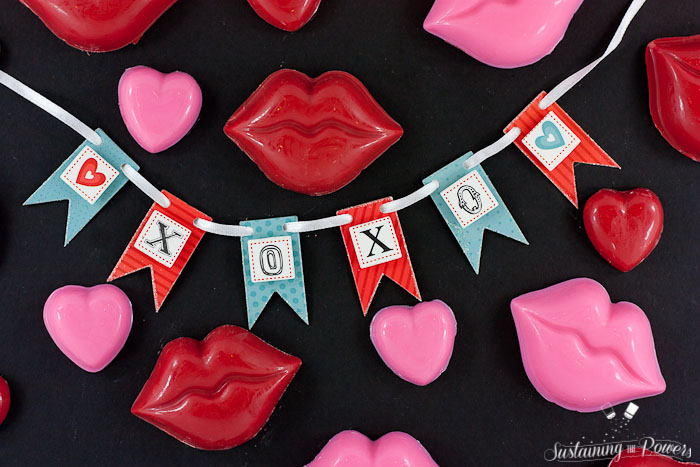
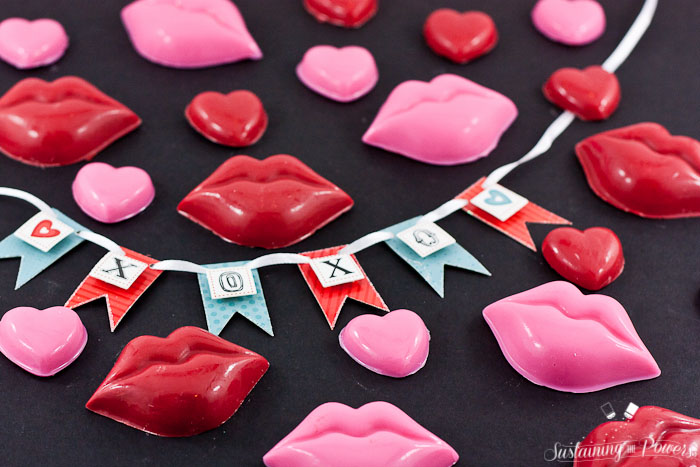
Learn how to make your own Valentine’s Day chocolates for your special valentine!
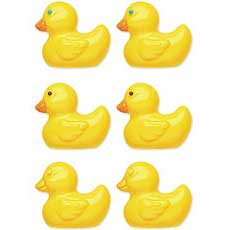
I first learned how to make chocolates back in middle school. I was looking for a way to make a lot of special Valentine’s Day gifts for my friends without breaking my budget. Back then, I was obsessed with rubber duckies, so I bought a ducky candy mold (which I realize now is probably intended for baby showers…) and made several dozen yellow ducky-shaped chocolates with orange beaks and little red hearts. Here’s Wilton’s example with the mold:
I proudly took them to school excited to show them off and give them away, and none of my classmates believed me when I said I made them myself! They all wanted to know where I’d purchased them so they could buy their own. (That’s about the time I started selling my own candy…) This was back before you could take cell phone videos, or Skype with someone, so I eventually ended up bringing in some candy melts and using my homeroom teacher’s microwave to prove that I could make them myself.
Today I’m going to show you how to make a basic molded chocolate/candy, and next week I’ll show you how to make a filled truffle/bon bon. I say chocolate/candy because technically the colored candy melts don’t contain any real cocoa, making them not actually chocolate. They’re made from sugar, soy, whey powder, milk solids, and coloring, so they’re more closely related to what we Americans call white chocolate (which is not actually chocolate either).
You can decide for yourself if it’s something you want to eat or not, but I personally wouldn’t substitute the Wilton Candy Melts with any other type of chocolate for molding them like this because the consistency of the melted chocolate of the other brands is not as smooth and easy to work with. I’ve tried many other brands, along with chocolate chips, and a few dark chocolate bars, and I keep coming back to these because Candy Melts are designed to be melted down into shapes and they work well every time.

If you’ve tried working with Candy Melts in the past and ended up with a burned mess or gloppy, seized chocolate, I have a few tips to share with you before we start molding chocolates.
Tips for Working with Candy Melts
1. Be Prepared to Be Patient. You have to be absolutely patient and take your time microwaving the chocolate at 30 second intervals and stirring or kneading after each interval until the chocolate is almost melted. If you try to speed the process up by using longer intervals, you’re going to change the structure of the chocolate and it’s going to become a Pinterest “Nailed it!” photo album. (You should check out that link if you need a good laugh!)
2. Use the Microwave. Lots of people put the chocolate in a glass bowl and try the double boiler method on the stove. I’ve always had a hard time with that method (and I hate the extra time and mess to get it into the molds), so I prefer using the microwave. I’ve had the best luck with getting consistently melted chocolate and not accidentally over melting or burning my chocolate.
3. Stop Heating Before It’s Fully Melted. You’ll get to a point in the melting process where you will have mostly melted chocolate, but there will still be a few small solid pieces of chocolate floating around. Don’t put it back in the microwave at this point because it will burn and separate, and just… bad things. You’ll want to just keep stirring or kneading the chocolate around and the warmth of the already melted chocolate should finish melting those last bits. (And if stirring doesn’t melt it quite enough, give it 5-10 more seconds and try stirring some more.)
4. Melt In a Decorator Bag or Ziploc. I usually buy the Wilton decorator bags when they go on sale because I like the fine tip and often use a decorator tip, but you can use Ziploc bags just as easily. I place the candy melts inside the bag and place the bag in a bowl then melt in the microwave as directed. Instead of stirring at the end of each interval in the microwave, I give it a quick knead through the bag. When I’m ready to mold the chocolate, I just snip about a quarter inch off the end and pipe it in. Plus, you can just toss the bag when you’re done!
So, now you know all my tips for getting the candy melts melted. From there, it’s super simple to mold your own chocolates. You just fill a plastic candy mold with the melted chocolate, tap the mold on the table a few times to pop any bubbles (or use a toothpick to get the really stubborn ones), and pop them in the fridge or freezer until they’ve hardened again. Gently twist the mold or give it a light tap, and they pop right out!

How to Make Your Own Chocolates with Candy Melts
- Prep Time: 5
- Total Time: 30
Description
Making your own chocolates is an easy gift idea for your special valentine!
Ingredients
Materials
- 1 bag Wilton Candy Melts in your desired color (or multiple colors)
- 1 decorator bag or Ziploc bag for each color candy melts
- 1 plastic or silicone candy mold in the desired shape (find these online or at most craft stores)
- Toothpicks
- Microwave
Instructions
- Place 1/2 a bag of candy melts into the decorator bag or ziploc, twist the bag above the melts, and place the bag into the microwave.
- Microwave on half power for 1 minute.
- Take the bag out of the microwave and knead the candy melts through the bag to help them start melting.
- Microwave for another 30 seconds on half power.
- Knead to mix.
- Repeat microwaving for 30 seconds and kneading until candy has fully melted. (Note that the candy will continue dissolving as you squeeze it through the bag, so stop microwaving when you see that all but tiny dime-sized lumps have melted.)
- Snip about a quarter inch off the corner or tip of the bag. (You want it just smaller than the diameter of a pencil.)
- Make sure your mold is dry, and place the tip of the bag all the way to the bottom of the mold.
- Gently squeeze the candy into the mold, making sure all small details have been filled in. I find it easiest to squeeze the chocolate from the bottom of the mold and let it fill up around the tip of the bag rather than squeezing it into the mold from above. I find I get fewer air bubbles (which equal imperfections later) and the details are filled in better this way. Fill it just up to the edge and don’t let it overflow.
- When all the cavities are filled, gently tap the mold on the table or pick it up a few inches and drop it back down flat on the table a few times to remove any air bubbles and settle the melted candy. Also inspect the mold from underneath (the bottom of the mold will be the top of your candy). If you still see a few bubbles, fill them in with a toothpick or the tip of the decorating bag.
- Place the filled mold flat on the shelf of your fridge or freezer and chill until fully hardened. About 20 minutes.
- Once candy has hardened, you’ll begin to see the chocolate pulling away from the side of the mold. Turn the mold upside down over a plate and tap gently or twist lightly until the candy pops out.
- If candy is not coming out of the mold, do not run it under hot water. You’ll lose the glossy molded surface. Instead, place it back into the freezer for another 10 minutes and try gently tapping and twisting the mold again to get it to pop out.
- Store in an airtight container at room temperature. (Refrigeration will cause condensation.)
Notes
- Be careful not to knock the chocolates together when you store them because their surfaces are soft and may crack or dent.
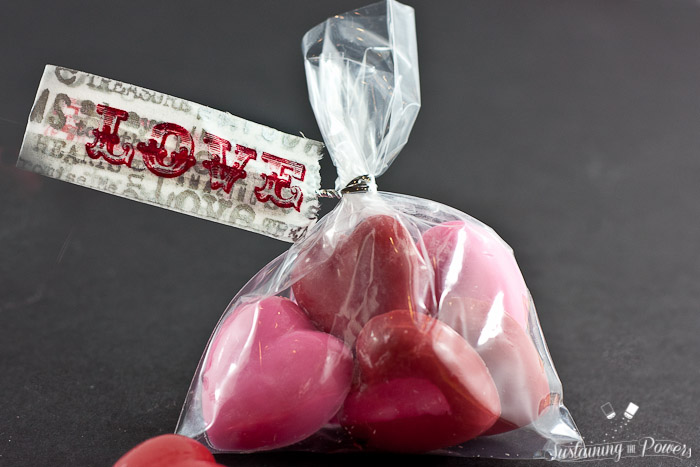
- I like to wrap these simply in a bit of plastic wrap or nicely in a candy bag with a bit of bakers twine or a twist tie. They can be attached to a card or gift bag as a great embellishment.
That wasn’t too bad was it? Next week I’ll be showing you how to take it a step further and make filled chocolate truffles and bon bons to gift in cute little candy boxes, so be sure to come back!


This is such a cute idea! The first time I used candy melts I burned the whole thing. But since then ive learned to keep a watchful eye over it. Ive never thought to melt it in the bag though – ive always melted it in a bowl and then scooped it into the bag. Your way sounds less messy and I think i like it a lot better!
I have done my fair share of melting them into a burned horrible mess. I even tried still using the burned chocolate once to make candies and gave them away to very gracious friends who pretended to like them. (Not my best moment.) I used to use a bowl as well until I discovered that I wouldn’t have to clean if I used the decorator bag. We food bloggers have to take all the mess-free cleanup we can get!
These are super cute! I’ve always wanted to make my own caramel filled chocolates:)
Thanks Lauren! I started with the solid ones this week since they’re basic, and I’ll be showing you how to make the caramel-filled ones next week! It’s not too bad- just a few extra steps to mold, chill, and fill them.
Beautiful Stephanie, I think will make few for myself. I have some Dulce de leche in my hand, may be as a filling.
Thanks Swathi! Dulce de leche sounds absolutely amazing inside filled chocolates! I’ll have to add that to my list of filling ideas. Thank you for the suggestion!
Making homemade chocolates would be so much fun! I love the idea of making them for Valentine’s Day. Yours are super cute!
Thanks Jenna! I really love making these each year as gifts and everyone thinks they’re so special!
Stephanie,
This is so creative! My husband has a sweet tooth and will love this.
My hubby says these are husband approved. I hope you enjoy them!
Hi. I want to flavor the candy melts. What kind is best and at what point in the melting process doin add the flavoring?
Thank you.
I don’t usually flavor the actual candy melts because I don’t usually like artificial flavorings, but you would need to use an oil-based flavoring and follow the directions on the bottle for quantities per volume of chocolate. (It varies depending on brand and flavor.) You’d add it just after the melting phase.
I prefer to make filled chocolates/bon bons instead and have a great tutorial on this post.
https://www.sustainingthepowers.com/how-to-make-your-own-filled-chocolates/