Description
Making your own filled chocolates is easier than you think!
Ingredients
Scale
For the Chocolates
- 1/2 bag light or dark cocoa wilton candy melts
- 1/4 bag contrasting candy melts (white, pink, etc)
- 2 decorator or ziploc bags
- 1-2 plastic candy molds or ice cube trays. (I used the bon bon mold from Wilton)
For the Peanut Butter Ganache
- 4oz (about 3/4 cup) vanilla flavor wilton candy melts (I used red so I’d have red centers)
- 2oz (about 1/4 cup) Peanut butter chips
- 1/3 cup heavy cream
Instructions
- Make the white chocolate peanut butter ganache (see directions below) and chill at least 2 hours or overnight. (Or make your own choice of filling.)
- Place 1/2 a bag of cocoa candy melts into the decorator bag or ziploc, twist the bag above the melts, and place the bag into the microwave.
- Microwave on half power for 1 minute.
- Take the bag out of the microwave and knead the candy melts through the bag to help them start melting.
- Microwave for another 30 seconds on half power.
- Knead to mix.
- Repeat microwaving for 30 seconds on half power and kneading until candy has fully melted. (Note that the candy will continue dissolving as you squeeze it through the bag, so stop microwaving when you see that all but tiny dime-sized lumps have melted.)
- Snip about a quarter inch off the corner or tip of the bag. (You want it just smaller than the diameter of a pencil.)
- Place the tip of the bag into the bon bon mold and pipe a small amount into the bottom. Using the tip of the bag spread the chocolate up the sides of the bon bon mold to make the outer shell of the bon bon. (see the linked Instagram video above for a clear visual.)
- Once all shells are finished, place the mold in the freezer for about 10 minutes, or until chocolate has mostly set.
- Add ganache to a decorator bag or ziploc and snip about 1/4″ off the end.
- Pipe ganache into the candy shells, leaving about 1/4″ of room at the top of the mold.
- Return to freezer to chill for another 10 minutes.
- Your cocoa candy melts have started to harden by now inside the decorator bag. Place them back in the microwave for another 30 second on half power, or until re-melted. (Don’t overmelt!)
- Remove the filled chocolates from the freezer, and pipe a small amount of chocolate over the filling to seal them.
- Pick up the mold and drop it a few times on the table in between every 1-2 chocolates to settle the chocolate smoothly on the filling.
- When all chocolates are sealed, return to freezer for another 5-10 minutes or until chocolate is set.
- Turn candies out of mold and gently tap to free any stragglers.
- To add an accent, follow candy melting directions above to melt a contrasting color of white chocolate in a decorator bag.
- Snip a small hole off the end of the bag and drizzle, swirl, or criss-cross the white chocolate over the finished bon bons.
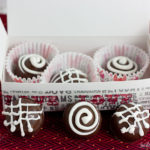
- Place in mini cupcake liners and a decorative box for a cute gift, or just eat them!
- Store any leftover cream-filled or dairy-filled candies in the fridge, just to be safe.
To make white chocolate peanut butter ganache
- Finely chop candy melts and peanut butter chips.
- In a microwave safe bowl or tupperware, combine chopped chocolate, cream, and peanut butter.
- Microwave on half power for 1 minute.
- Remove from microwave and whisk with a fork until cream and chocolate has combined as much as possible. (There will still be lumps)
- Return to the microwave for another 30 seconds on half power.
- Stir until fully combined, microwaving again if chocolate still hasn’t fully melted.
- Cover and refrigerate for at least 2 hours, or overnight.
Notes
- You can use any number fillings, ganache, chopped nuts, straight peanut butter, boozy fillings, jams, jellied, spreads, caramel, dulce de leche, cookie butter, etc. Anything you dream up, try it out!
- Gluten-free: The candy melts are gluten-free, take care to check the ingredients of your fillings.
- Vegetarian: These are vegetarian.
- Vegan: These are not vegan, as the candy melts all contain milk solids. Feel free to try this method with vegan chocolates and fillings.