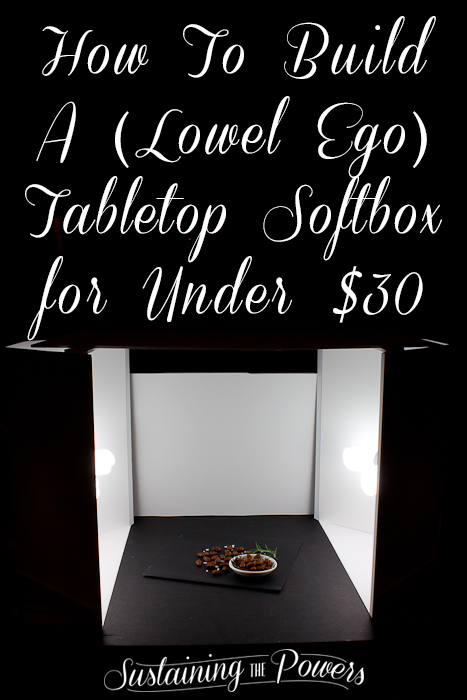
Build A DIY (Lowel Ego) Tabletop Softbox for under $30!
I am super duper excited to share this tutorial with you today! For the longest time I have been forced to make my meals according to when the best natural light was available to photograph it. This meant either not photographing the foods we eat for dinner, making dinner at 2 pm so I could photograph it before reheating dinner at dinner time, or saving a bunch of “beautiful” leftovers to photograph them the next morning. (Did you know you were mostly getting photos of my leftovers?)
This post contains affiliate links. Sustaining the Powers is a participant in the Amazon Services LLC Associates Program, an affiliate advertising program designed to provide a means for sites to earn advertising fees by advertising and linking to Amazon.com. When you use these links to make purchases, I earn a portion of the sales at no extra cost to you. Thanks for helping to keep our pantry stocked! <3
I put a tabletop Lowel Ego light on my wishlist, but quickly realized that for $150 it wasn’t happening anytime soon. Especially not if I wanted 2 of them to use at the same time for the best light. So, I started the Googling and found a few different tutorials for making your own and merged a few together into my own softbox.
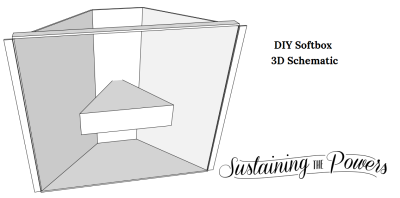
This tutorial was mostly inspired by a diy lowel ego softbox tutorial I saw online several months ago by a blogger named Mawoca. He had a supply list and a few images, but nothing near step by step. (Sadly, the website is no longer online, so I can’t link back to it.) I showed the tutorial to my woodworking hubby to ask if we could make one, and he mocked the whole thing up for me in Google SketchUp! (I love being married to an engineer!) It was really easy to assemble with all the 3D models done for me. He also agreed to make a second one (mostly) slowly enough for me to take photos while he worked so I can share it with you all.
I took almost 80 photos for this tutorial, and rather than making the worlds longest blog post, I decided to compile them into a video tutorial. On my journey to make the video for you, I started out making some voice recordings so I could talk you through it. Well, my computer decided that it was going to crash and blue screen both times I tried recording audio, so after starting over twice I scratched the talking and went with video captions instead. Hopefully it still gets the point across for you.
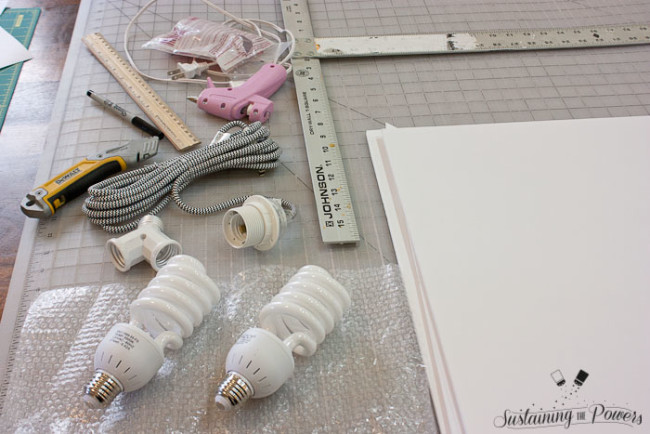
Materials I purchased
- 3 Sheets of 20″ x 30″ (posterboard size) white foam board (3@$1.99=$5.97)
- 1 Ikea Hemma cord set ($5 at IKEA) (I got one with chevrons!)
- 1 Y Twin-Socket Lamp Holder Adapter ($2.48)
- 2 ALZO Full Spectrum 27W, 5500K Daylight Compact Fluorescent CFL Light Bulbs ($12.53 for 2 – I bought a 4 pack to make 2 softboxes. The color temperature of the lights make all the difference in the world for this softbox, so I strongly recommend you order these specific bulbs, or some that are as close to 5500K as possible. You will likely need to order online to find the right color temp.)
- 1 Ikea Knoppa white flat bed sheet ($3.99)
Total: $29.97
Additional Materials I had On Hand
- Yardstick (I used Hubby’s giant T-square)
- 12″ wooden or plastic ruler
- hot glue gun + glue sticks
- xacto/utility knife
- fine point Sharpie marker
- Craft cutting mat (I have a small quilting one and a large quilting one in this tutorial because I really like the grid lines for lining things up, but you can really use any surface you’re okay with cutting on as long as you make sure to protect your table!)
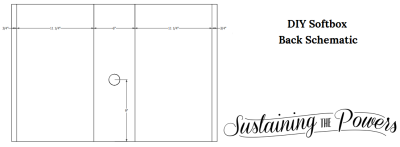
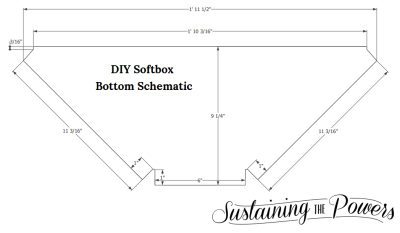
Here’s the PDFs that will show you exact measurements. If you have a woodworking hubby like I do, maybe you can just hand them over and he’ll surprise you. 😉 (Note that we changed up the cross bar at the top to make it a bit wider and more stable from the 3D model, but everything else is basically the same.) I used the measurements to cut the main back piece, but used the method I show you in the video to line up and cut the bottom piece.
Click the image to download the file.
Here’s the video tutorial of how to put it together. Enjoy!!
I built 2 of these softboxes and use another piece of foam board on top of the two boxes to reflect the light back down onto the food. I use another across the back to bounce the light forwards. Here’s a few shots I’ve taken with my new boxes:
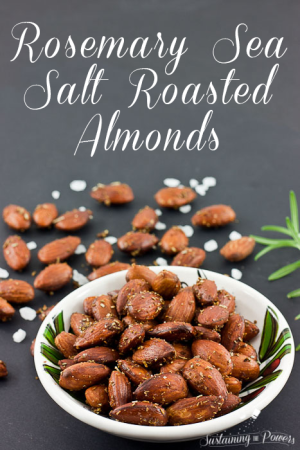
(This image is in the setup inside the lightbox in the top image for this post.)
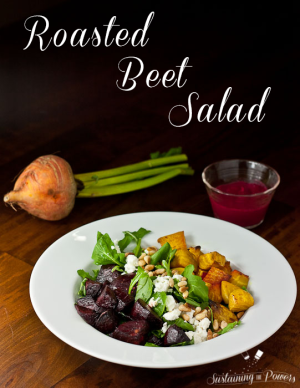
Isn’t the lighting great? You wouldn’t know they weren’t shot in natural light.
I’m so excited to have an option for taking photos whenever I want. Cheers to blogging at 2am!

")


This is absolutely fantastic!! I have hardly no natural lighting in my house what so ever. This will be a great project!!!
I have a tiny bit, but in Colorado it gets so dark so early. It’s been a huge lifesaver!
Thanks so much for this Stephanie! I love how clear your instructions are – I’m not particularly good at DIY but I’m sure with a bit of help I’ll be able to pull this off. Your husband makes it look so easy!
I tried to make it as super easy as possible because I know not everyone does DIY. (And I changed a few steps from the original build to involve less math and more hands-on and eyeballing it with photos.) It’s a pretty forgiving build as long as you score instead of cut when you’re supposed to, and as long as you score from the correct sides. Even if it’s not perfect, it will definitely get the job done. Hubby likes the exact perfection of an engineer woodworker (it was hard for him to simplify steps when I asked him to make changes), but in the end it’s just a foam board box with some lightbulbs, so there’s flexibility. The key piece is to cut the circle for the light fixture pretty carefully so it’s a snug fit and the bulbs don’t wobble, and to order the correct bulbs because most others will make food look strange. I’m sure you’ll be fine. Tag me on Instagram when you build one!
Thanks! I can’t wait to make this! I’ve been looking for a great and affordable tutuorial!
You’re welcome! Let me know how it turns out!
This is just what I needed! I have been having a hard time with getting enough recipe posts because I have a limited amount of time where I can take pictures during the day. This could be the solution! I love how affordable and easy to make it is. Thanks, Stephanie!
This has totally been my solution for getting more recipe posts together! I couldn’t wait to share it. I had a huge archive of recipes, but no photos to go with them because I didn’t have daylight at dinner or leftovers the next day. I actually thought I would hate shooting without natural light, but I love the photos with these almost as much as my natural light photos. Plus, I love that I can get some good shots no matter the weather. I hope it helps you as much as it helps me!
Wow! This is really useful for even more than just food photography, it’d even be great for pictures of small crafted items. Great resource 🙂
Sorry I missed your comment until now. It’s excellent for taking photos of small craft items! You can even set them up with one of those inexpensive pop up white boxes to get the infinite background look.
Thank you, Stephanie, this might be just what I need!
Yay! I’m glad it helped you!
Thanks for sharing. I made something similar! http://www.thecitybee.com/2015/06/two-diy-ego-lights-for-40/
Wow- this is fantastic! I was just wanting to buy a Lowel Ego right now, but cannot cough up the cash. I am showing this to my hubby tomorrow and going to try to make one. Thanks SO much for sharing this! I pinned to my blog board.
Thank you for sharing and pinning! It’s been a great in-between for me too. Though I have yet to buy “official” lowel lights because these have been working just great. Did you end up making them?
You are awesome and this is awesome! I have been making cooking videos and it is a pain to be restrained to making the videos during the day so I can get nice shots of the food at the end.. I had considered buying the EGO light but it costs $470 in Australia! Absolutely ridiculous… But you this is truly amazing, thank you so much for sharing!
Awesome! I hear you on the frustrations with being forced to use daylight hours only. Sometimes I love to bake at midnight, and you just have to take your photos before you fully devour your creation you know? I have used a real EGO light, and while it is a bit better, it’s not worth the crazy cost needed to upgrade them, so I’m still sticking with these over a year later. I hope you love them too!
Do you use these lights for video making as well as photographs?
Sorry I missed replying to your comment before. Yours looks nice! I like that you can collapse yours back down if you want to. My hubby and I are both engineers and we got a bit carried away with structure stability… They’re not going anywhere!
Thank you for sharing this tutorial! I was able to make two with no problem; I am so excited to see an improvement in my pictures and not be so confined by perfect sunlight!
I’m so glad it was helpful to you! When you’ve used it in a shoot, stop by and share a link! I’d love to see. 🙂
Hey Stephanie! I was able to use my light boxes for my latest post that just published this morning! I couldn’t have gotten as beautiful pictures, with little editing, without these boxes!!! Thank you thank you thank you!!! http://www.ijustmakesandwiches.com/recipe/make-gnocchi-home/
That gnocci looks delicious! And it looks like the light boxes worked really well for you!
Hubby always makes fun of me when I shoot at night because I build a fort of light boxes and white foam board reflectors around my food. If you haven’t seen it already, this tip for a $2 reflector also comes in handy for me when shooting with these: http://www.sustainingthepowers.com/food-photography-friday-my-2-dollar-secret-for-better-lighting-in-your-blog-photos/
Hello, Im so glad I found this post. I used your video and made this last week. It is awesome! I wasn’t able to buy the lowel ego because its not available on amazon right now. I just started my own blog and need a good light to take my pics. Thanks so much for putting in the time to make this video. It has helped out a lot and I’m excited to start taking professional pictures of my food for my blog!
I love this! Definitely making these ASAP. With two little kids, photography during daylight hours is hazardous to my setup and my camera. Thank you for sharing!
Haha. I can just imagine how “helpful” they could be. I’m due with my first child this summer and I imagine my lights will be getting more use than ever after that! Let me know how they turn out!
brilliant! Thank you SO much for creating such a thorough tutorial! I can’t wait to make my own.
I’m so glad it’s helpful for you! I really appreciate how thorough my husband is when he helps me engineer something and I’m glad I can pass on his plans.
Thanks so much for this post. I live in Sweden and the Lowel EGO light is not available from what I can tell.
I’ll be sourcing the material and getting it put together before the dark season hits us again.
Thank you, thank you, thank you! This tutorial was great. So thorough and beyond helpful. I made 2 and they both came out perfect. I am so excited to try the lights this week.
Thank you, thank you, thank you!! Your tutorial was super easy to follow and I accomplished the entire project within an hour! I plan to build another one and I’m sure it will take even less time now that I have one under my belt.
I’m so glad you found it helpful! It’s been a few years now and mine are still going strong!