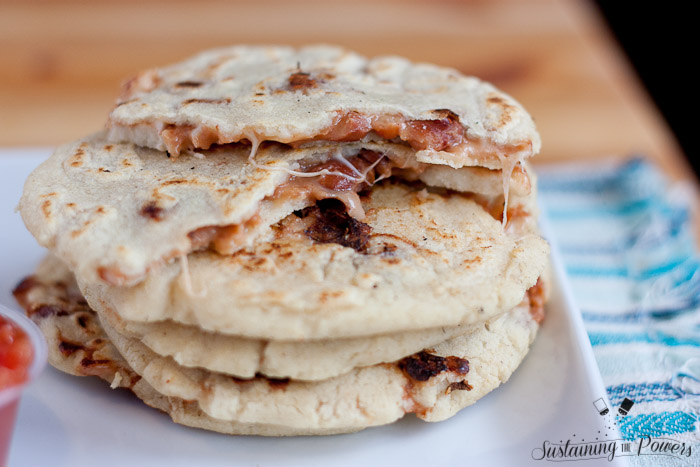
Salvadorean Bean and Cheese Pupusas are pillowy bean and cheese-stuffed corn tortillas.
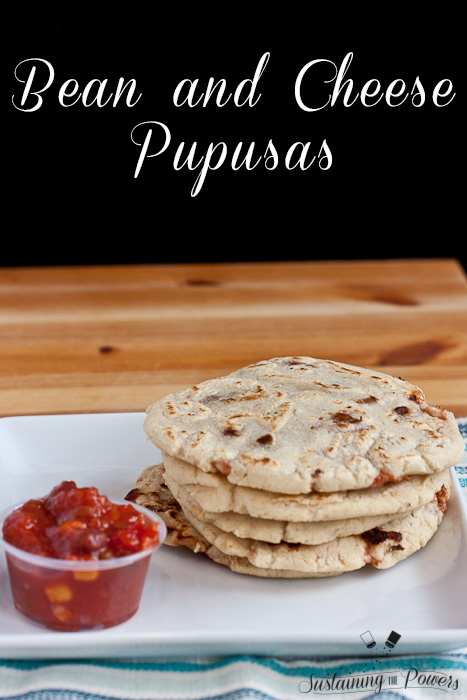
5 years ago, my husband and I got engaged while on a mission trip in El Salvador. While we were there, we learned how to make traditional bean and cheese pupusas from one of the abuelas in the church we were working with. If you’ve never had a pupusa before, they’re basically handmade corn tortillas that are stuffed with a filling before cooking. Most of the time cheese is involved, so they end up hot and melty – like a quesadilla, but way better.
This post contains affiliate links. Sustaining the Powers is a participant in the Amazon Services LLC Associates Program, an affiliate advertising program designed to provide a means for sites to earn advertising fees by advertising and linking to Amazon.com. When you use these links to make purchases, I earn a portion of the sales at no extra cost to you. Thanks for helping to keep our pantry stocked! <3
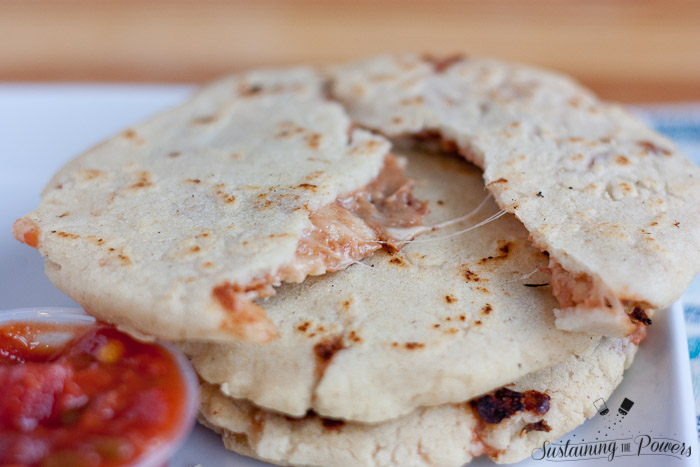
Look at that melty cheese! There’s a ton of different options for filling these, but our go-to is almost always beans and cheese just because we always have it on hand. Some of the other traditional types are pupusas de quesillo – filled with a soft, Central American cheese called quesillo that I’ve rarely found in the US, pupusas de frijoles refritos – filled with just refried beans, pupusas mixtas – filled with beans, quesillo, and chicharrón (which is a ground, cooked pork paste that’s different from the pork rind by the same name), and pupusas de queso con loroco – filled with cheese and loroco, an edible Central American flower sometimes sold in Latin grocery stores.
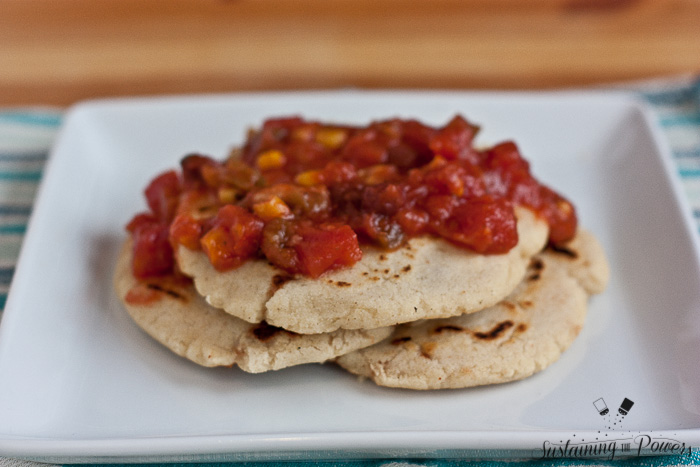
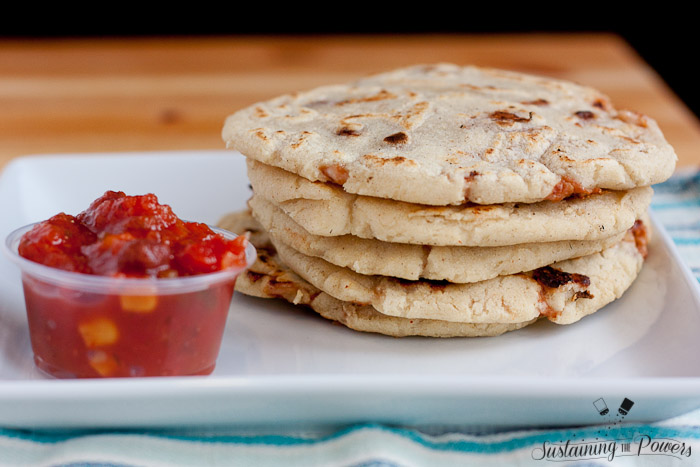
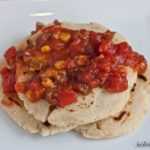
They’re traditionally served with a pickled cabbage relish called curtido (It’s pretty similar to kimchi). It started snowing this morning and I really didn’t want to go out in the snow just to make some slaw for these, so it’s not pictured, but here’s a link to a recipe so you can try it. Hubby and I aren’t as big on the fermented stuff, so we prefer these with just some salsa or some tomato sauce.
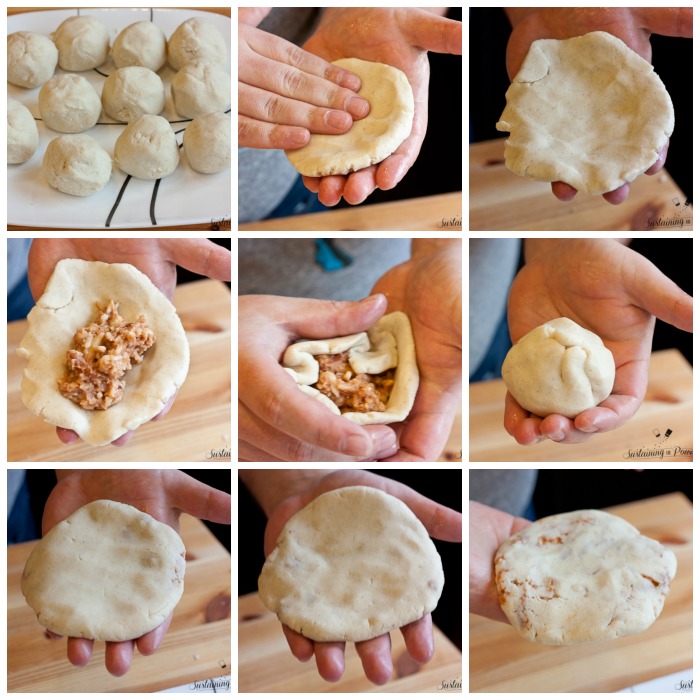
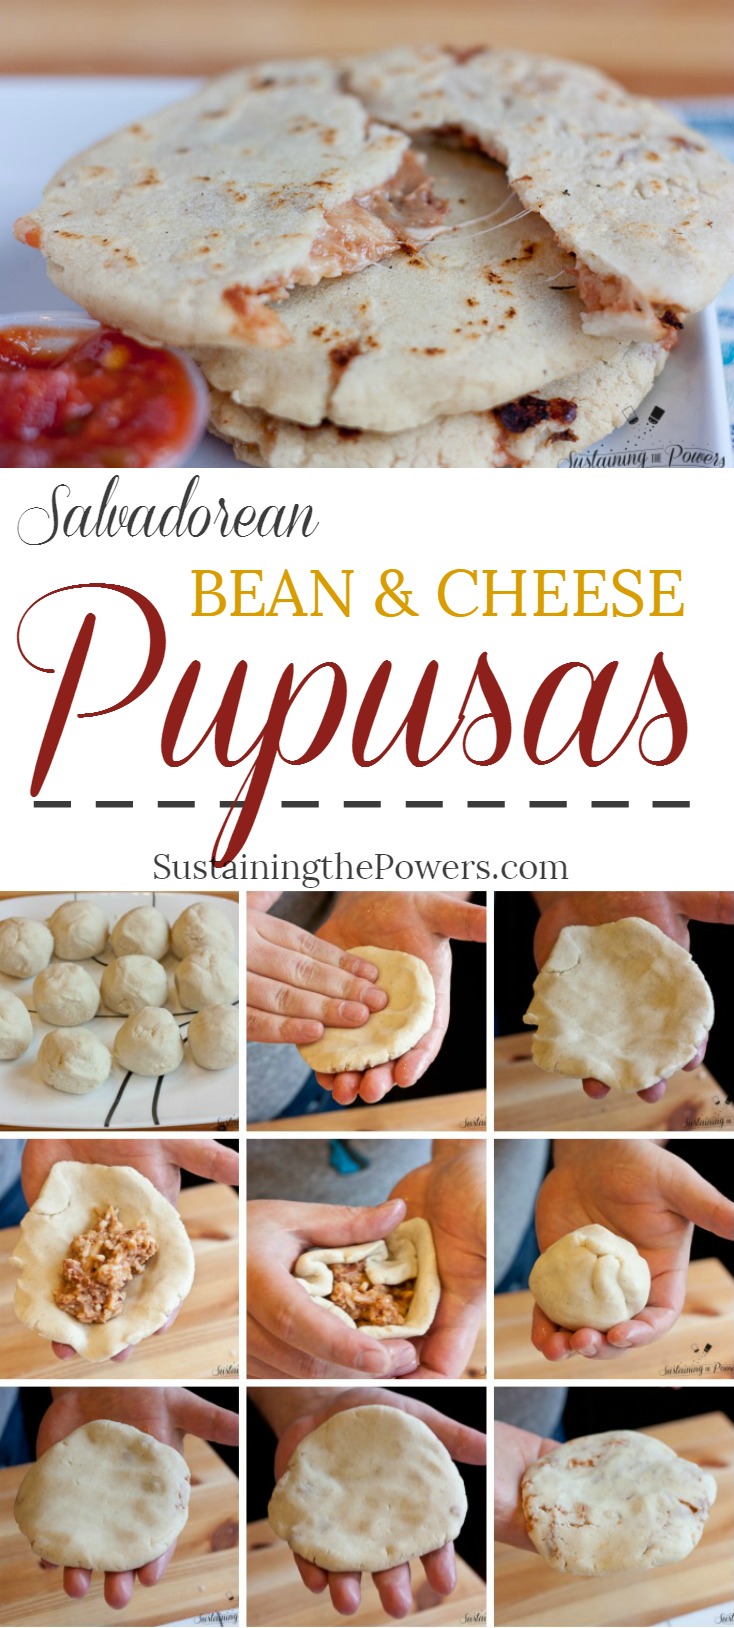
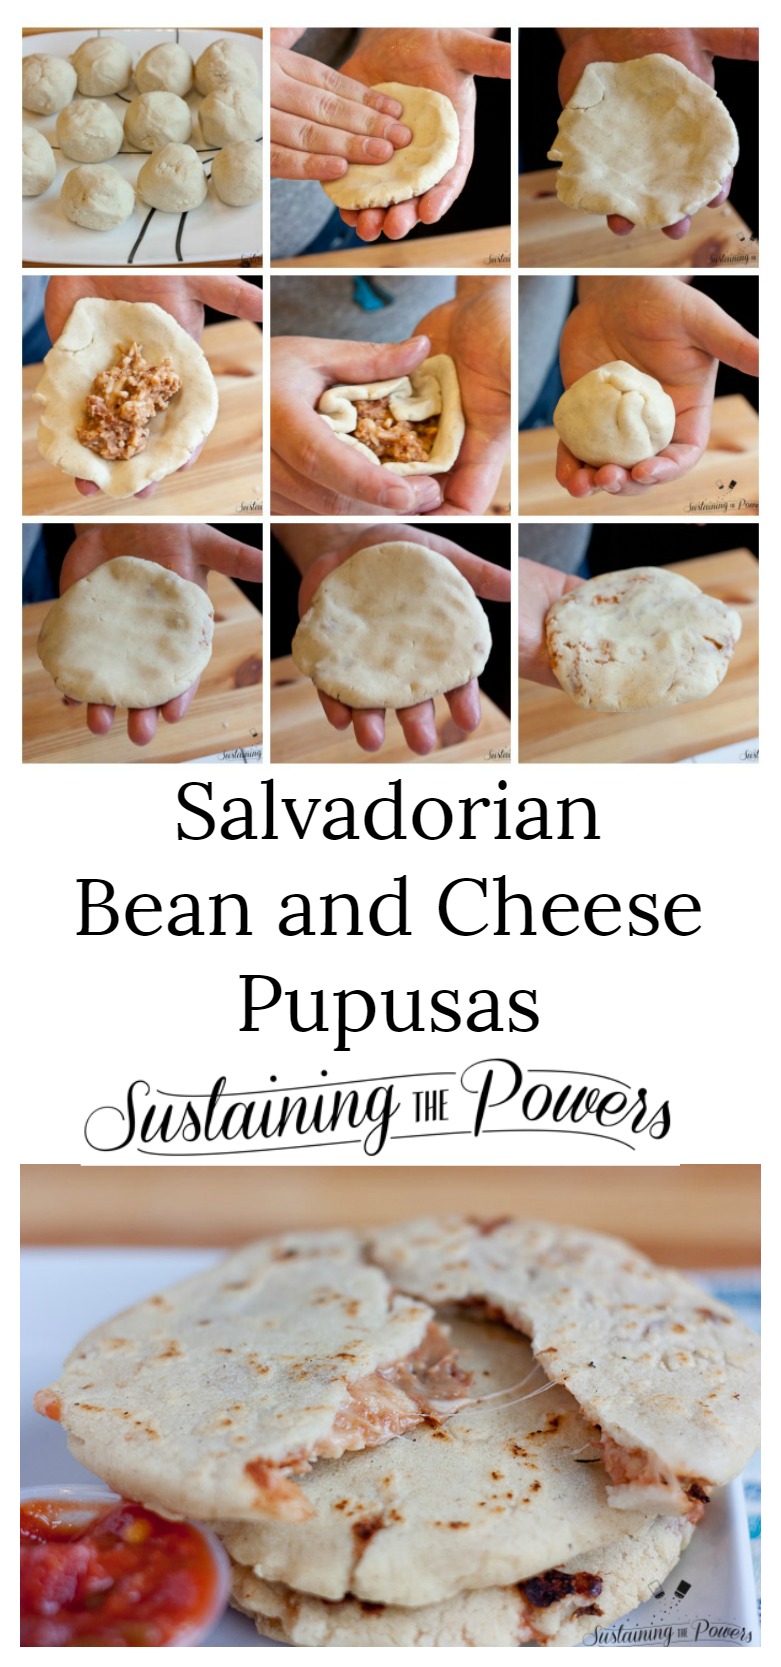
These come together quickly, but I will say that the trickiest part is forming the pupusa. You can cheat and use a tortilla press if you like, but I still find it a bit easier to shape them by hand. You’ll make the masa and form it into balls, lightly oil your hands, press the ball out flat, add the filling, and pinch the dough closed around the filling. After the filling is inside, you’ll press the ball back out flat, trying to make sure the filling is evenly distributed. Then you just grill it up until it’s slightly brown and beginning to blister. Here’s a video of my hubby shaping a pupusa so you can get a good idea of how to do it:
Don’t worry if you can’t get it to work the first time. (Not all of mine were perfect this go round anyways.) It will still taste delicious and you’ll get better with practice, I promise. (And more pupusas for the sake of “practicing” isn’t ever a bad thing.)
The best part about these bean and cheese pupusas is that they’re incredibly cheap, already gluten-free, and can be adapted with sooooo many fillings to make them fit any of your dietary needs. Pretty much anything you can make into a paste can be stuffed into the masa. I’ve seen roasted butternut squash, spinach, zucchini, red beans, plantains, peanut butter and jelly (not my fave, but it wasn’t disgusting), apple butter, kale, eggplant, hummus, and any variety of meat pastes and shredded cheese stuffed inside non-traditional pupusas.
Bean and Cheese Pupusas
- Prep Time: 15 min
- Cook Time: 5 min
- Total Time: 20 minutes
- Yield: 10 pupusas 1x
Description
Salvadorean Pupusas are pillowy bean and cheese-stuffed corn tortillas.
Ingredients
- 2 cups Maseca Instant Corn Masa Mix (not the kind for Tamales), available at most grocery stores or here on Amazon
- 1.5 cups water
- 2 Tablespoons vegetable oil
- 1/4 teaspoon salt
- 1 cup re-fried beans (canned or homemade)
- 1 cup shredded mozzarella cheese (or quesillo if you can find it)
- additional water and oil for your hands
Instructions
- Mix maseca, water, oil, and salt in a medium bowl until well combined. Dough should be moist and have the texture of play-dough. It should not crack when pinched. If dough is too dry, add more water, 1 tablespoon at a time until the right consistency is reached.
- Cover dough and allow it to rest while mixing the filling.
- Heat re-fried beans for 30 seconds in the microwave to soften. Combine with shredded cheese.
- Divide dough into 10 equally sized portions and form into balls.
- Wet hands with a bit of water and vegetable oil to prevent sticking.
- Press dough ball out flat until it’s about 1/2″ thick.
- Add 2 tablespoons of filling mixture into the center of the dough.
- Pinch the dough closed around the filling until it forms a ball again.
- Gently press the ball back out flat until it’s about 1/2″ thick again.
- Place onto a lightly-oiled griddle over medium heat for about 2 minutes per side, or until pupusa surface begins to brown and blister.
- Serve hot with salsa or curtido.
Notes
- Any number of other fillings can be used as long as they are somewhat paste-like to be able to spread out inside the pupusa dough.
- Gluten-free: These are gluten-free!
- Vegetarian: These are vegetarian if using vegetarian re-fried beans.
- Vegan: Choose a vegan filling – refried beans, squash puree, spinach puree, etc.
Pin this Bean and Cheese Pupusa Recipe For Later!
Meal Plan Monday 2/16-2/23:
Click Here for the (Now Mobile-Friendly) Weekly Shopping List Printable!
This meal plan is designed to feed approximately 4 adults at each meal or two adults with lunches left over. Feel free to double or add to it as needed. **You’ll need to open it with the free Adobe Reader App (Android or iOS) to be able to use the check boxes on mobile, so install that first if you don’t have it already.**
Monday: These Bean and Cheese Pupusas (gluten-free, vegetarian, vegan option) – I love how cheap and flexible pupusas are. I can’t believe they aren’t more popular everywhere!
Tuesday: Taco Stuffed Zucchini Boats from Skinny Taste (gluten-free, vegetarian option) – I am a huge fan of these zucchini boats. You hollow the zucchini out, remix the centers, and stuff these with taco goodness without any of the guilt!
Wednesday: My Slow Cooker Butternut Squash Risotto (gluten-free, vegetarian, vegan option) – I adore risotto, but I hate standing at a stove for an hour while stirring it. For this recipe, you just toss it all into the slow cooker and come back in an hour to add in some sauteed butternut squash!
Thursday: Brussels Sprouts Slaw with Cabbage, Carrots and Peanut Sauce from Simplicity Relished (gluten-free option, vegan option) – I’m adding some shredded chicken to this amazing cruciferous salad and making a meal out of it. The peanut sauce dressing is yummy, and easily gluten-free since you’re making it from scratch.
Friday: Pizza Night with this Low Carb Crustless Pizza from Food Faith Fitness (gluten-free, vegetarian option) – This pizza fascinates me because you use egg whites (or I use whole eggs) as the base for the pizza. You end up with all the flavors of pizza without all the carbs.
Saturday: Date Night – Eat Out!
Sunday: Y.O.Y.O – You’re on your own.
Linked up with:


Thanks for linking up to my pizza! I hope you love it!
I do love it Taylor! We eat what’s on the meal plan the week before I post them so I don’t end up with any flops – it’s sooo yummy! I ended up using whole eggs instead of just whites because I didn’t have any other use for the yolks, and it turned out perfectly!
I’ve never had pupusas before. You make them look like so much fun to make!
They are so fun! We typically get a whole group together and have a pupusa making party – people love to play with their food!
Love this recipe! And I’m loving your meal planning. That is awesome! Especially because you share the shopping list. 🙂
Thank you Kristy! I hope you’re finding lots of new recipes to try. And I’m glad to know the shopping lists are useful! For a while there, I thought I might be making them just for myself.
These look quite delicious! I haven’t really gotten out of my comfort zone when it comes to cooking, so maybe one day I will do that and try these 🙂 Sending love from the Peony Project! Your food looks so so tasty!
Thanks Tori! They may look like sort of complicated, but they’re actually very forgiving. (kind of like play doh) In the worst case scenario, you have some cheese sneaking out as you grill them. 🙂
Oh my goodness, these look and sound INCREDIBLE! Like, I-want-to-jump-into-my-computer-screen-and-eat-all-of-them-right-now incredible. I can’t wait to make these – my husband is going to flip! 🙂
Thank you Anne Marie! I can’t wait to hear how you like them!
These look so yummy!! I can’t have corn, but I don’t think a corn fre version would be to difficult to make….
I LOVE refried beans, they are so cheap and making them at home with dried beans makes them even cheaper and you can control everything that goes into them.
Thanks Rebekah! Though the traditional pupusa is made with corn masa, rice flour is a popular alternative. I’m sure you could find a recipe for them. (Arroz=rice if they pop up in Spanish.) I really need to try making my own refried beans. I typically end up buying them canned just so I can keep them on hand for a spur of the moment recipe, but I know they’re super simple. Do you think they’d freeze well?
They do freeze well Stephanie! I have measured them into 2 cup portions and put them in a ziploc bag. You can press them flat and then they stack easily. 🙂
I LOVE this post – step by step photos usually annoy me, except when it is something I might be completely unfamiliar with.
I like how you laid this out so simply 🙂
Thanks @KyleeCooks:disqus ! I don’t usually like doing step by step photos either because they’re really not necessary, but this one really needed a visual since it’s a bit of a trick to get them formed. 🙂 So worth it though! They’re delicious!
Exactly – sometimes the photos can be just too much. This is an awesome example of when it’s crucial to the post! Well done, you!
Could these be made with flour instead of corn flour?
Unfortunately flour wouldn’t work. The maseca is a corn tortilla mix that is ready with the addition of water. Swapping that ingredient for plain flour wouldn’t make a tortilla, it would just make a paste. If you want a flour version, you could try making a quesadilla with my homemade flour tortillas recipe here instead: http://www.sustainingthepowers.com/traditional-homemade-flour-tortillas/
Hi Stephanie
My name is Lorena and I’m from El Salvador. I just saw your recipe and it makes me super happy to know that you took time to learn how to make pupusas. If you want I can give you the original recipes for the chicharron, curtido, and salsa.
curtido is like a salad that you use as a topping with the salsa. Thank you for your video.
Lorena,
I hope you approve of my recipe and thank you for your sweet words! 🙂 I would love to see your recipes for the traditional filling and sides. I’ve made curtido a few times before with some recipes from the internet, but couldn’t source the ingredients in time for taking photos back when I made these. Chicharron especially would be neat to know how to make because all my attempts seem to fall short of what I remember it tasting like.
I would love it as well. I tried Pupusas for the first time when a coworker went out to lunch and purchased some. I have been trying to find a recipe sense. I found this one but was wondering about the cabbage salad and there was a red sauce that went on it ad well. There was a choice of mild or hot. It was truly the best thing I had tried in a long time.
Oh my gosh, I love pupusas and you made these look so appetizing Stephanie! Yummmmmy!! Chipotle flavored refried beans would be so good here too!!
My mouth is literally watering. My family would love this..
I’ve tried making pupusas in the past & have difficulties with the cooking part! How can you tell if your griddle is the right temperature? I’m excited to try again, but I’d REALLY be happy if I can get the cooking part right. Thanks so much!!!!
You can use the water test – sprinkle some water on the pan/griddle and if it evaporates really fast, it’s too hot. You want the water to form beads and dance around the surface for a second.
Could pupusas be cooked on a grill outdoors? When I was in El Salvador, they were cooking them outside on the streets. Any alternate cooking suggestions? I don’t have an indoor griddle surface (living in an RV)!
They should be able to be cooked on any flat surface, so I’d put a pan down on your outdoor grill and watch the heat so they don’t burn, but it should be great. I wouldn’t put them directly on the grill grate though – they’re a bit doughy until cooked, like a tortilla, so they would likely fall through or get stuck and burn.
These were so good, and relatively easy to make! I will definitely make these again!
Coby, I’m so glad you enjoyed them!
I’m a little confused on an ingredient. The recipe calls for 2 cups Maseca Instant Corn Masa Mix (not the kind for Tamales). But I thought Maseca is what you use for Tamales?
There are 3 different types of Maseca – white corn flour, yellow corn flour, and corn meal. The corn meal is a thicker grind you use for tamales and it says Tamal on the front. That won’t work here. You want the white corn flour sold by Maseca that looks like this:
https://www.amazon.com/dp/B075MWHHF4
Will Masa Harina work? It says it’s a golden corn flour.
Thank you!
Traditionally they’re made with a white corn flour and not yellow/golden, but I think the masa harina you’re describing should work fine as long as it’s a fine grind like flour and not a coarse grind like cornmeal. The way things are right now, we definitely have to make do with what we have!
Can you use flour instead if corn meal. I’m not fond if corn anything but chips.
Unfortunately you can’t substitute all purpose flour for these. Maseca is more of a corn tortilla mix, so just plain flour won’t work out.
You might like my flour tortilla recipe instead.
Would it be feasible to make these ahead?
They are definitely best when made fresh, but they can be made ahead, refrigerated in an airtight container, and reheated in a dry pan on the stove if needed.