Take these 5 easy steps to make sure your next post gets all the social media love it deserves.
Today I wanted to talk about 5 things you should do to your blog images before you publish your next post. I’ve seen these mistakes being made all over the web (and even made a few of them myself for a while!), and wanted to help you avoid making them in your next blog post. Don’t worry, they only take a minute or two to fix!
1. Change Your File Name to Match Your Post Title Before You Upload
If your photo gets downloaded or shared somewhere, the file name usually goes with it. Change it to something that leads back to you! (I can’t tell you how many times I’ve gone to feature someone’s post, saved an image from their blog, and found the image title to be something I’ll never be able to find on my hard drive.)
Having a file name like “IMG_3477” or “aslkjjfff-235567” doesn’t really tell you much about where it came from or who created it does it? But an image name like “Rosemary-Roasted-Almonds-Sustaining-the-Powers” tells you both exactly what the image is and where it came from. Another bonus to changing the file name: the image then becomes searchable, and helps boost your SEO.
[Tweet “If your photo gets downloaded or shared somewhere, the file name usually goes with it…”]
2. Write a Short Description/Caption for Pinterest
You want your awesome image to be pinned to Pinterest and be re-pinned to drive traffic to your blog right? By writing a great caption for your Pinterest post, you’re helping control what gets displayed when someone pins your image.
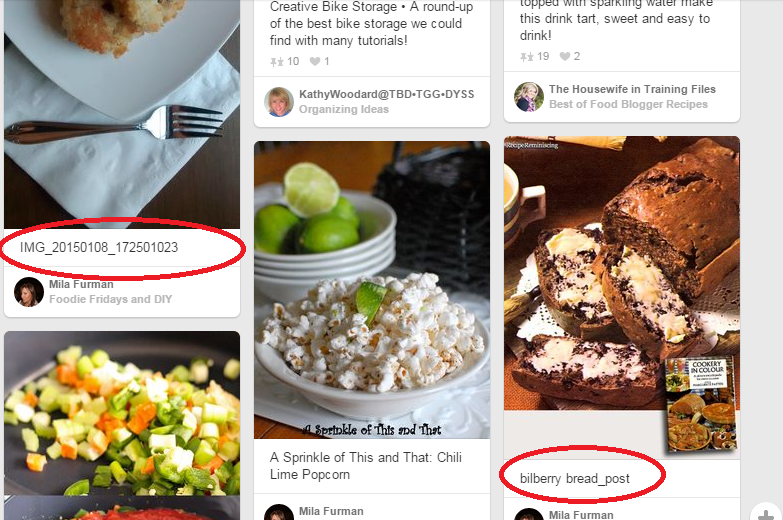
By default, Pinterest pulls the pin caption from the “description” of the image in your gallery. No description? It pulls the image name. That’s why you see so many pins with weird labels like “IMG_3456” or “Blog_Post_3”. People who pin things don’t often take the time to write a thorough caption for a post, so you should help them along by doing it for them!
Look at the two circled examples below from my Pinterest feed. Would you click on either of these? Do you have any idea what the food is with the fork there? It turns out that’s a Risotto Cake with Pigeon Peas, but I had zero idea until I clicked through and would have scrolled right on past it if I wasn’t curious to find out for this example. (I definitely re-pinned that chili lime popcorn though. Yum!)
3. Paste This Pinterest Description in for the “Alt Text” and “Description” Box of Each Image
If you do these steps for each image, your awesome caption will automatically be pulled when someone uses your “pin it” share button, a “pin it” hover plugin, or a “pin it” Pinterest bookmark in their browser. (And probably any other way they pin things, but those are the only 3 I used to test.)
[Tweet “If you do these steps for each image, your awesome Pinterest caption will automatically be pulled…”]
For WordPress:
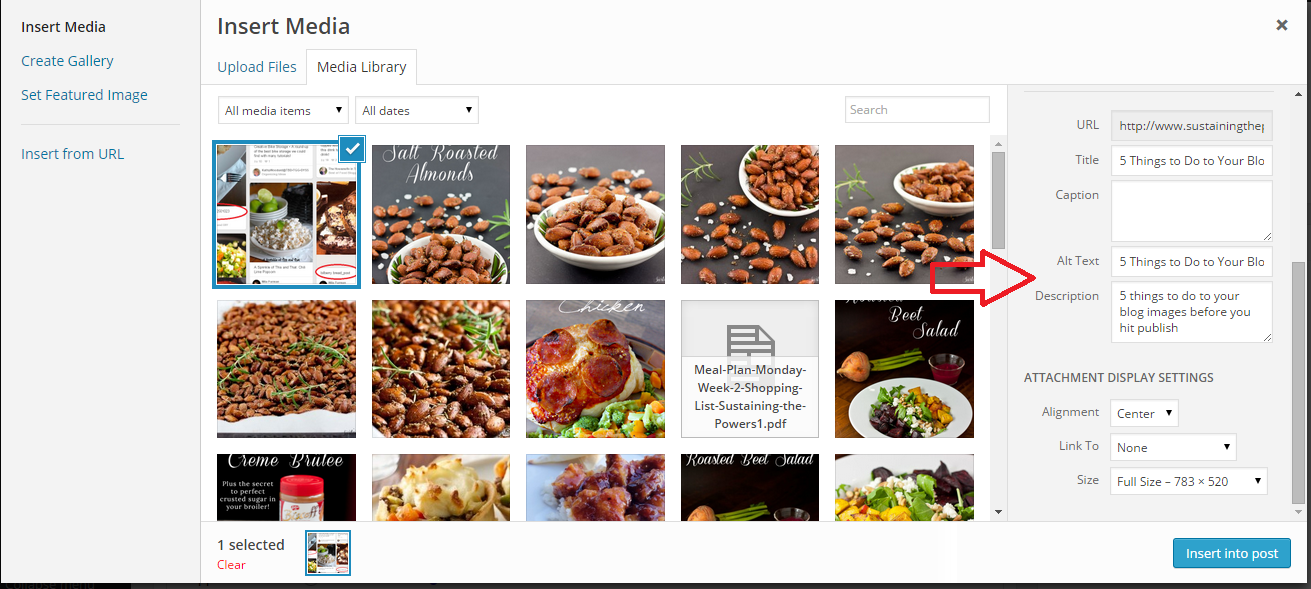
Go to “Add Media” at the top of your edit post dashboard page.
Click the image you want to insert.
Scroll down on the right until you see the “Alt Text” and “Description” fields.
Paste the caption you want to use for Pinterest into both boxes.
Click “Insert Into Post.”
For Blogger:
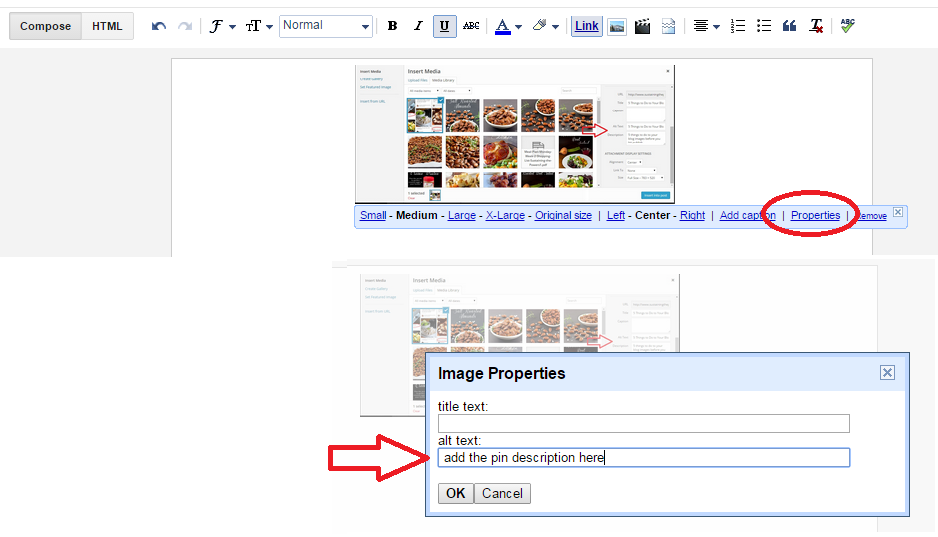
Click the Insert Image button at the top and insert your desired image.
Click on the image (while still in your edit screen) and select “Properties.”
Paste the Pinterest caption into the box that says “alt text”.
4. Select the Drop Down that Says Link To “None” (WordPress only)
You really don’t need anyone to be opening the attachment page unless you want them to be able to view the image really, really large. Even then, I’d suggest using a gallery plugin or something like that to enable that feature. When people open the attachment and then pin from that page, you end up with those lovely pins that only go to an image and it’s often difficult to find out where the actual post is. (You get URLs like: “http://www.sustainingthepowers.com/wp-content/uploads/2015/01/5-Things-to-Do-to-Your-Blog-Images-Before-You-Hit-Publish-No-Description-Sustaining-the-Powers.png” Ugly right?) Make it hard for people to pin just a single image by not linking them to their attachment pages. (And I think Blogger does this by default. Can any Blogger users chime in and let me know in the comments?)
5. Set a Featured Image
The featured image is what WordPress will use to create a thumbnail of your post and will be the default image pulled for all the previews on social media. It’s also used by “recommended posts” type plugins and a few others, so it’s always good to take a few seconds to set one on each post as you write it so you don’t have to come back and do them all later. (Which I’ve heard has happened before.) I typically like to use a landscape oriented photo for my featured image one since G+, Twitter, Facebook and thumbnails all do best with landscape images.
To Set a Featured Image on WordPress:
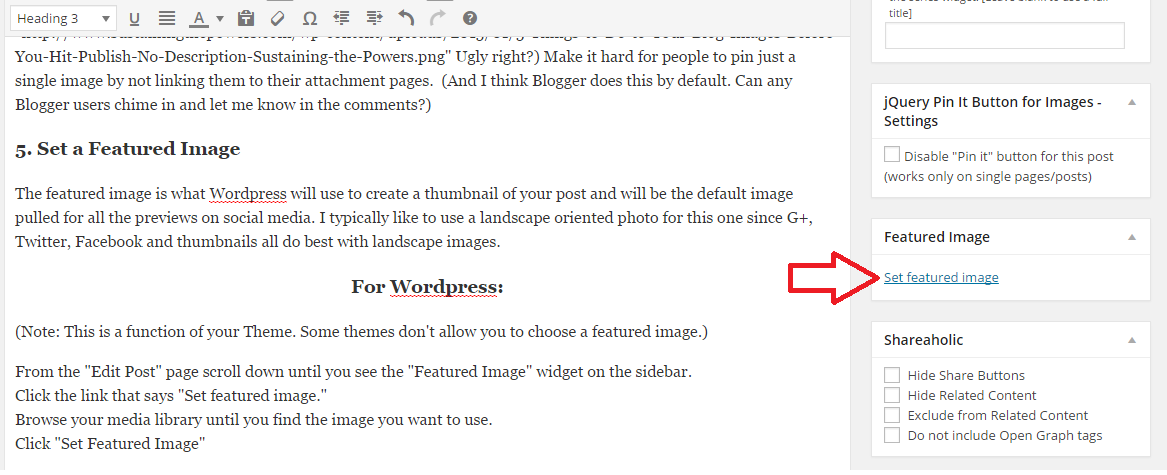
(Note: This is a function of your Theme. Some themes don’t allow you to choose a featured image.)
From the “Edit Post” page scroll down until you see the “Featured Image” widget on the sidebar.
Click the link that says “Set featured image.”
Browse your media library until you find the image you want to use.
Click “Set Featured Image”
For Blogger:
This is a possible function of your Theme. Many themes don’t allow you to choose a featured image/thumbnail in Blogger. If your theme doesn’t allow it, try this tutorial for adding featured images to your Blogger theme.
So there you go! Each of these things only takes a few extra seconds, but it can make a world of difference in how your post gets shared and in making sure your images link back to you.


")
This is a great checklist! I try to do all of these before I hit publish, and it makes a big difference!
Thanks Jenna! It definitely makes a huge difference. Especially changing the file names before upload. I always check mine now and then to see what people see when they download.
Thank you for the tips Stephanie!!! This is great! I had no idea about the pinterest caption! I will definitely start using that!!! 🙂
You’re so welcome Brandy! It’s been great for me, and I love seeing the captions I wrote get pinned again. I think it’s even helped a few pins go semi-viral! I hope it works well for you. 🙂
Good tips! I’ve just read the other day about the importance of proper file name to match a post description. I didn’t know that before. Will take a closer look at my future posts to make sure all necessary info is there.
Sorry I’m just seeing this comment – I’m glad this was helpful to you! I often get more traffic from image searches than I do from post titles, so I definitely think it’s important!
This is a great article! Thank you for sharing. I already see one area where I’ve been doing it a little wrong so looking forward to knowing what I’m doing going forward!
I’m glad it was helpful to you Emily!
Wow, Stephanie, these are great!! I had no idea how to change the alt properties to make the Pinterest description automatic. Thank you so much!!!!
Thank you for sharing. Just a few weeks ago I began doing these things. I have been blogging 2 years (when I could) and now I need to make it profitable to help pay some medical costs.
I am spending weeks going back and creating images, using SEO, setting the featured image, etc..
You are right. It is much easier to do the first time around. I wish someone had shared this when I first started.
I’m so glad you found this post helpful! I wrote it because I saw so many of my clients and other bloggers missing out on the powerful seo possibilities of their images. It’s so important! Feel free to share it on social media so it can help someone else. 🙂 And best of luck with increasing your blog revenue! I know first hand how much time, hard work, and a bit of luck goes into making a profitable blog. I hope you enjoy the process.